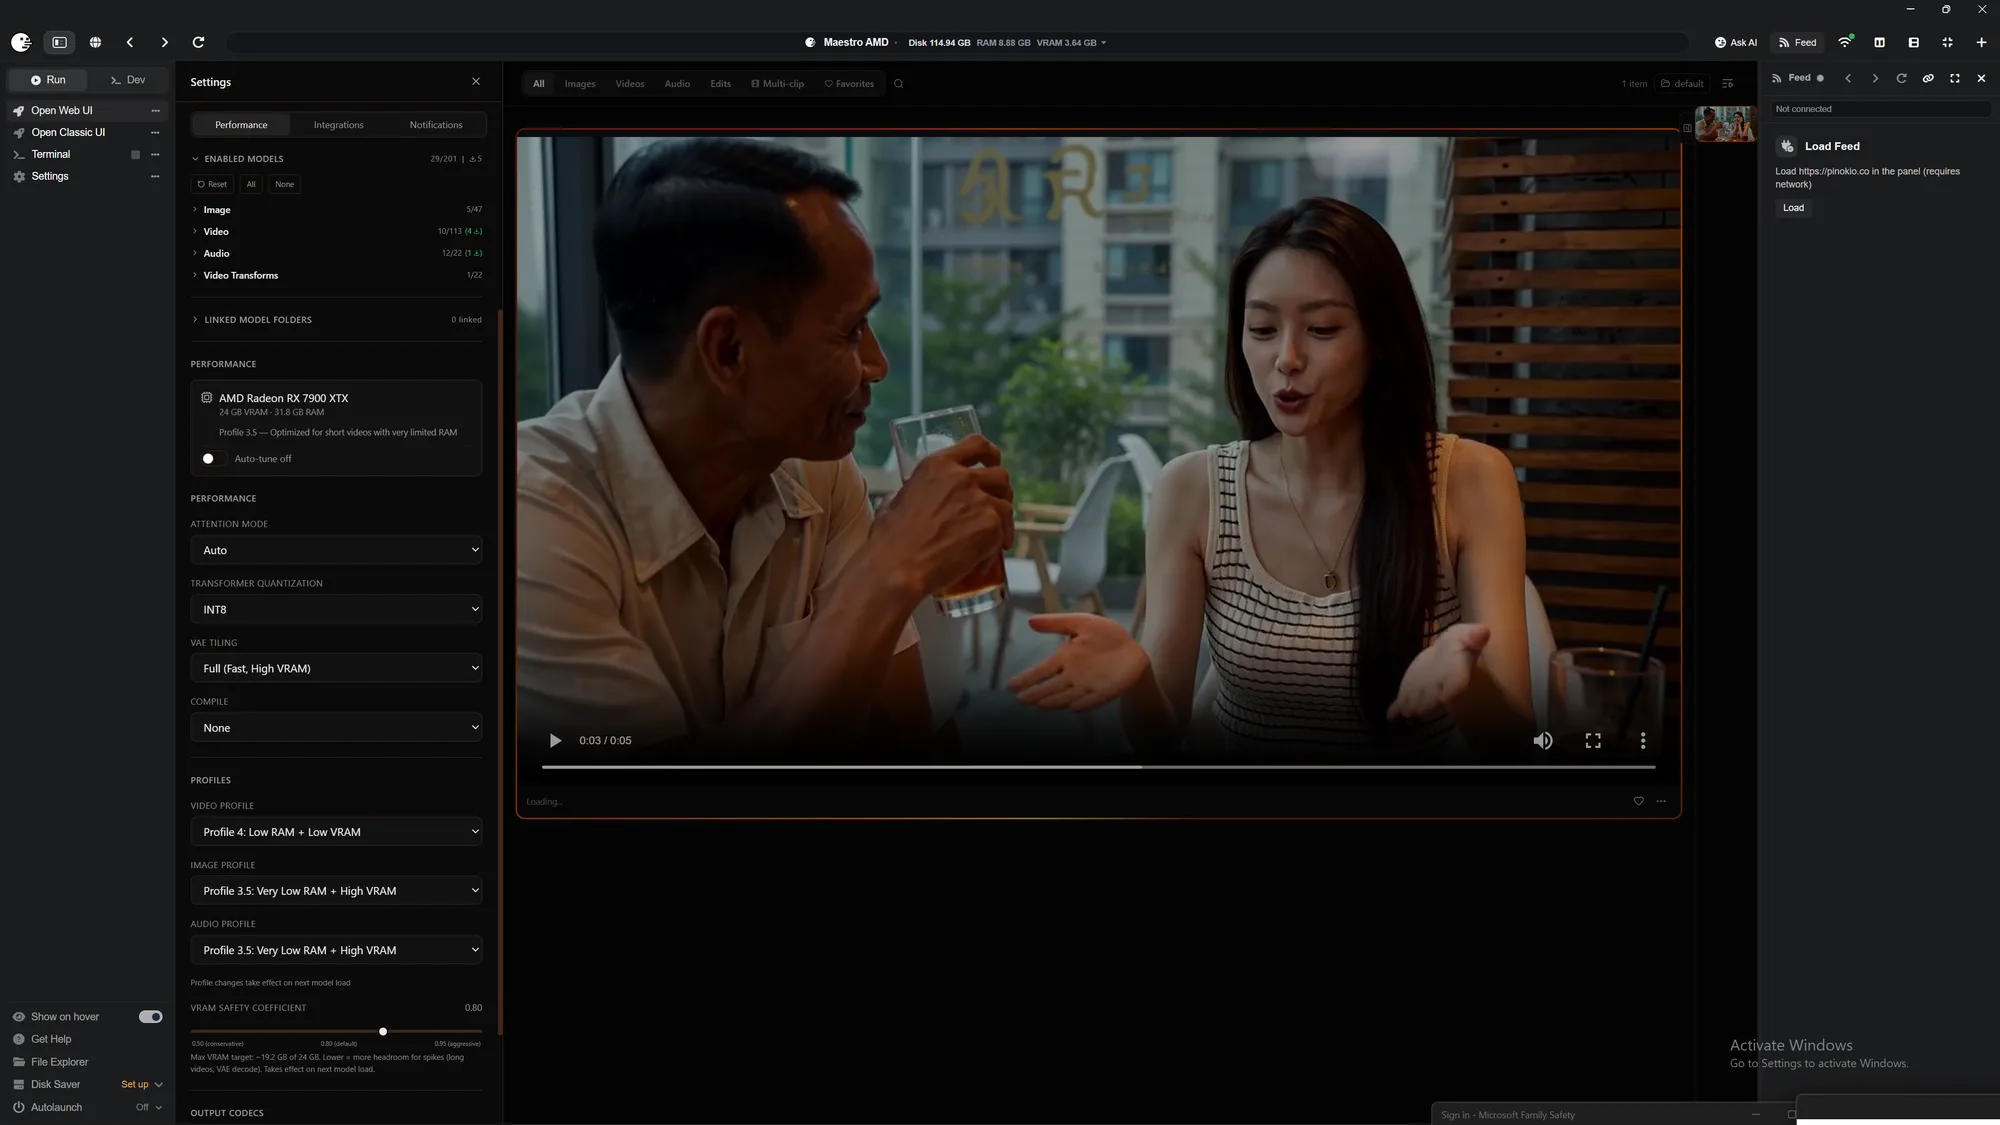
A known-good starting configuration for Maestro on AMD, taken from generations that actually completed — not from theory. Start here, confirm it runs, then experiment outward.
Measured on:
| GPU |
Target |
VRAM |
System RAM |
OS |
| Radeon RX 7900 XTX |
gfx1100 |
24 GB |
32 GB |
Windows 11 |
Read this first — lower settings first, always
The most common way to conclude "Maestro doesn't work on AMD" is to open it and immediately ask for a long, high-resolution clip. On a 24 GB card with 32 GB of system RAM that will stall — and the stall looks exactly like a crash, because nothing prints while it grinds.
Run the smallest generation in the ladder (Step 3) first. Once you have a finished video in hand, your install is sound, and everything after that is tuning rather than debugging. Scaling up from a working baseline takes minutes; debugging a stall from a cold start can take an evening.
Step 1 — Global settings
Set these once in Settings. They apply to every generation.
| Setting |
Value |
Why |
| Memory profile — Video |
Profile 4 |
LowRAM_LowVRAM. The important one — see Step 4. |
| Memory profile — Image |
Profile 3.5 |
Images are small enough to hold in VRAM. |
| Memory profile — Audio |
Profile 3.5 |
Same reasoning. |
| Attention mode |
auto |
Resolves to SDPA on AMD. Don't pick Sage or Flash — they aren't installed. |
| Transformer quantization |
int8 |
Default. Keeps the model inside 24 GB. |
| Text encoder quantization |
int8 |
Default. |
| LLM Device (Services) |
CPU |
Keeps the Director planning LLM off the GPU so it doesn't compete for VRAM. Correct on any vendor. |
Note — profiles are set per media type. Video gets 4; image and audio get 3.5. Setting video to 3.5 is the mistake that cost me an evening.
Step 2 — The generation setup
This is the exact configuration behind every completed video below. Studio → Video → References, with two reference images.
| Setting |
Value |
Why |
| Mode |
References |
Two reference images — one per subject. I use one person per image. |
| Model |
H3 Omni — Pruned |
Not the "Fused 4-Step (Experimental)" variant — see below. |
| LoRA |
minimax_h3_turbo_v4_step600_ema |
A turbo LoRA. This is what lets 6 steps look like far more. |
| Steps |
6 |
With the turbo LoRA above. Without it you need far more. |
| Guidance scale |
1.0 |
Turbo LoRAs are trained for low guidance. |
| Flow shift |
5.0 |
Model default for this variant. |
| First Block Cache |
on · 0.08 · start step 1 |
Free speed. Enabled in nearly every successful run. |
| H3 Text Encoder |
GGUF Q4_K_M |
Weeks of successful runs. Use Q2_K if you have under 32 GB RAM. |
| Sliding window / overlap |
345 / 18 |
Defaults. Left alone. |
⚠️ Avoid for now — the H3 Fused 4-Step (References, Experimental) model stalled every time, at workloads the 6-step model handled comfortably. It's labelled experimental for a reason. Get the 6-step configuration working before you try it.
ℹ️ On the text encoder — if a menu offers NVFP4 AWQ (Recommended), ignore the "Recommended". NVFP4 is an NVIDIA-only format, and on AMD it can drag the whole machine into swap. Recent Maestro AMD builds override this for you; older ones don't.
Step 3 — The ladder, start at the bottom
Every row below is a real generation on the rig above. Packed rows is Maestro's own measure of how much work an attention pass is doing, printed in the console on every run. It scales with resolution and frame count, which is why it predicts stalls better than either alone.
| # |
Resolution |
Frames |
Steps |
Packed rows |
Result |
| 01 |
704×704 |
124 |
6 |
19,306 |
✅ start here |
| 02 |
704×704 |
243 |
6 |
37,981 |
✅ |
| 03 |
1280×704 |
141 |
6 |
41,194 |
✅ |
| 04 |
736×736 |
243 |
6 |
41,832 |
✅ |
| 05 |
704×704 |
345 |
8 |
52,781 |
✅ ceiling |
| ✕ |
Fused 4-step |
any |
4 |
36,746–41,294 |
❌ stalled |
Start at rung 01 — 704×704, 124 frames, 6 steps. Low resolution, short duration, few steps. It isn't meant to be your final output; it's meant to prove the install works and give you a timing baseline. Once it finishes, note how long it took.
Then move up one rung at a time. Rungs 02–04 are all comfortable. Rung 05 is the heaviest thing completed here, and it needed 8 steps with the cache off — treat it as the ceiling, not a starting point.
Maestro prints this on every run; the packed-row figure is what you compare against the table:
[MiniMax H3 Perf] 736x736, 243 frames/10.12s, 41,832 packed rows,
6 steps; attention=sdpa, cache=first-block/0.08
Step 4 — Why the video profile matters most
Of everything on this page, this is the setting most likely to make the difference between "works" and "appears frozen".
Profile 3.5 ("VeryLowRAM_HighVRAM") tries to load the model entirely into VRAM. Its stated minimum is 32 GB RAM and 24 GB VRAM — exactly this rig — and with a 20B transformer plus a 32B text encoder it still doesn't fit. It falls back to paging and starves.
Profile 4 ("LowRAM_LowVRAM", which Maestro itself marks Recommended) streams only the parts it needs. Same generation, same model, less than half the RAM.
| Signal |
Profile 3.5 |
Profile 4 |
| Transformer preloaded |
13,348 MB |
58 MB |
| Process RAM |
17.6 GB |
8.5 GB |
| GPU compute |
idle |
95% |
| Result |
stalled at step 0 |
completed |
Check which mode you're in from the console at model-load time:
Async loading plan for model 'transformer' :
  base size of 58.04 MB will be preloaded ...         <- streaming, good
  13348.60 MB will be preloaded (+72% of layers) ...  <- preloading, will starve 32 GB
Step 5 — Once it works, then experiment
Everything above is the part worth calling proven. Below is worth exploring — but only after you have a finished video, so you always have a working configuration to fall back to.
Change one thing at a time.
- Other LoRAs — the turbo LoRA is what makes 6 steps viable. Swapping it usually means raising steps; expect to re-tune both together.
- Other H3 variants — Omni, First/Last, Full. Same profile and encoder settings apply; start each new variant back at rung 01.
- Text encoders — Q2_K is lighter on RAM and noticeably faster to load; larger encoders cost RAM you may not have spare.
- Other model families — Wan 2.x and LTX use small, GPU-resident text encoders, so they load faster and lean harder on the GPU. Good options if H3 feels heavy.
- Longer clips — frame count drives packed rows fast. Add frames before resolution.
If something stalls — change back the one setting you just changed. If it's still stuck: check the video profile is 4, compare your packed-row count against the ladder, and run Diagnose from the Pinokio menu. It reports your GPU, PyTorch build, and whether fast attention is actually available on your card.
Numbers come from Maestro's own console output across runs that completed. Other cards — especially RDNA 2 and the Ryzen AI APUs — may behave differently; run Diagnose to see what yours reports.
Written by cekli.com



A known-good starting configuration for Maestro on AMD, taken from generations that actually completed — not from theory. Start here, confirm it runs, then experiment outward.
Measured on:
Read this first — lower settings first, always
The most common way to conclude "Maestro doesn't work on AMD" is to open it and immediately ask for a long, high-resolution clip. On a 24 GB card with 32 GB of system RAM that will stall — and the stall looks exactly like a crash, because nothing prints while it grinds.
Run the smallest generation in the ladder (Step 3) first. Once you have a finished video in hand, your install is sound, and everything after that is tuning rather than debugging. Scaling up from a working baseline takes minutes; debugging a stall from a cold start can take an evening.
Step 1 — Global settings
Set these once in Settings. They apply to every generation.
Note — profiles are set per media type. Video gets 4; image and audio get 3.5. Setting video to 3.5 is the mistake that cost me an evening.
Step 2 — The generation setup
This is the exact configuration behind every completed video below. Studio → Video → References, with two reference images.
⚠️ Avoid for now — the H3 Fused 4-Step (References, Experimental) model stalled every time, at workloads the 6-step model handled comfortably. It's labelled experimental for a reason. Get the 6-step configuration working before you try it.
ℹ️ On the text encoder — if a menu offers NVFP4 AWQ (Recommended), ignore the "Recommended". NVFP4 is an NVIDIA-only format, and on AMD it can drag the whole machine into swap. Recent Maestro AMD builds override this for you; older ones don't.
Step 3 — The ladder, start at the bottom
Every row below is a real generation on the rig above. Packed rows is Maestro's own measure of how much work an attention pass is doing, printed in the console on every run. It scales with resolution and frame count, which is why it predicts stalls better than either alone.
Start at rung 01 — 704×704, 124 frames, 6 steps. Low resolution, short duration, few steps. It isn't meant to be your final output; it's meant to prove the install works and give you a timing baseline. Once it finishes, note how long it took.
Then move up one rung at a time. Rungs 02–04 are all comfortable. Rung 05 is the heaviest thing completed here, and it needed 8 steps with the cache off — treat it as the ceiling, not a starting point.
Maestro prints this on every run; the packed-row figure is what you compare against the table:
Step 4 — Why the video profile matters most
Of everything on this page, this is the setting most likely to make the difference between "works" and "appears frozen".
Profile 3.5 ("VeryLowRAM_HighVRAM") tries to load the model entirely into VRAM. Its stated minimum is 32 GB RAM and 24 GB VRAM — exactly this rig — and with a 20B transformer plus a 32B text encoder it still doesn't fit. It falls back to paging and starves.
Profile 4 ("LowRAM_LowVRAM", which Maestro itself marks Recommended) streams only the parts it needs. Same generation, same model, less than half the RAM.
Check which mode you're in from the console at model-load time:
Step 5 — Once it works, then experiment
Everything above is the part worth calling proven. Below is worth exploring — but only after you have a finished video, so you always have a working configuration to fall back to.
Change one thing at a time.
If something stalls — change back the one setting you just changed. If it's still stuck: check the video profile is 4, compare your packed-row count against the ladder, and run Diagnose from the Pinokio menu. It reports your GPU, PyTorch build, and whether fast attention is actually available on your card.
Numbers come from Maestro's own console output across runs that completed. Other cards — especially RDNA 2 and the Ryzen AI APUs — may behave differently; run Diagnose to see what yours reports.
Written by cekli.com