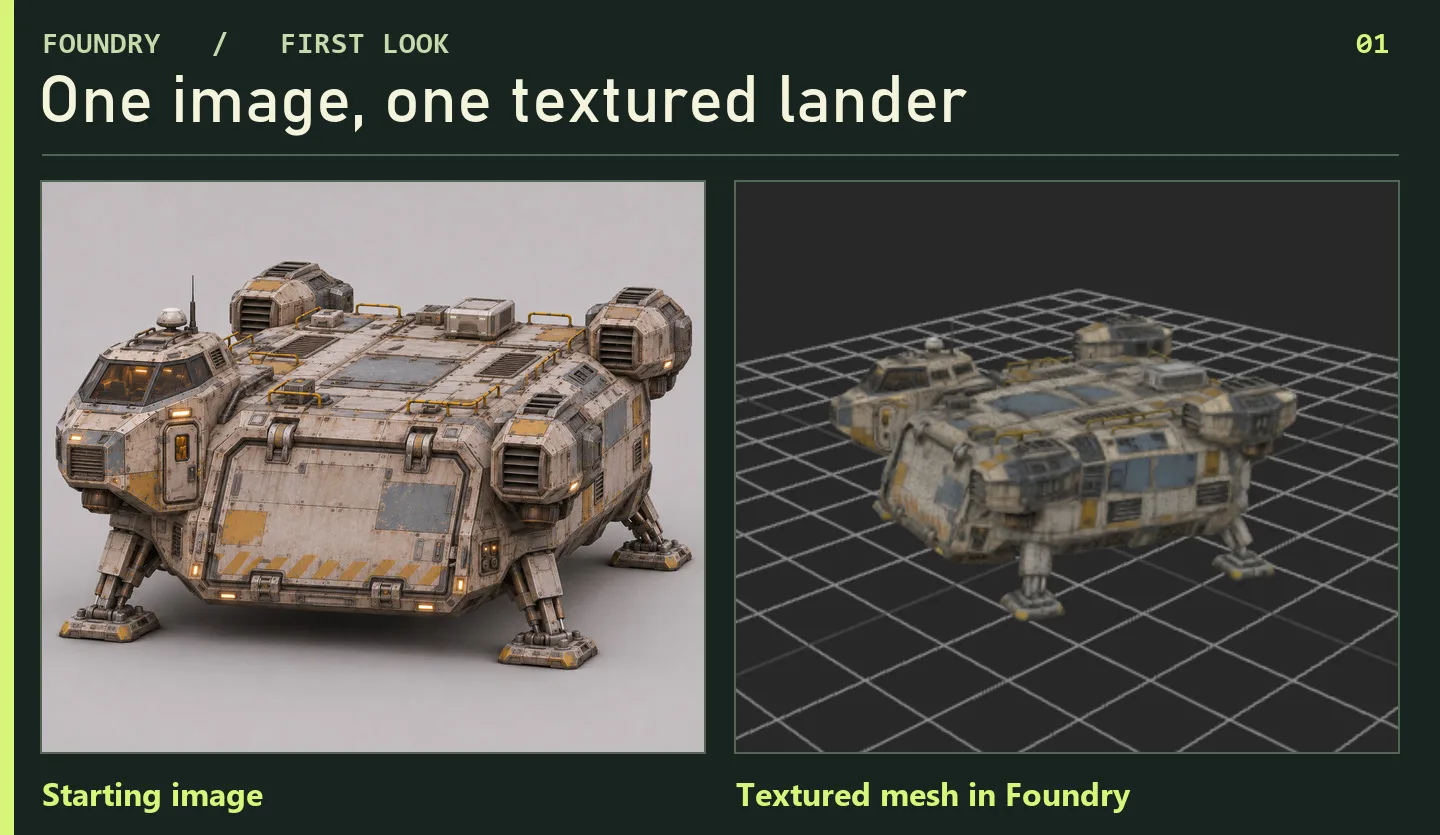
I wanted to show what it actually looks like to make something in Mumblebox 3D Asset Foundry. Here’s one cargo lander from start to finish, using a single reference image. Foundry runs locally, and Pinokio handles setup. You can follow the wizard without learning the ComfyUI node editor.
1. Pick a workflow and add an image
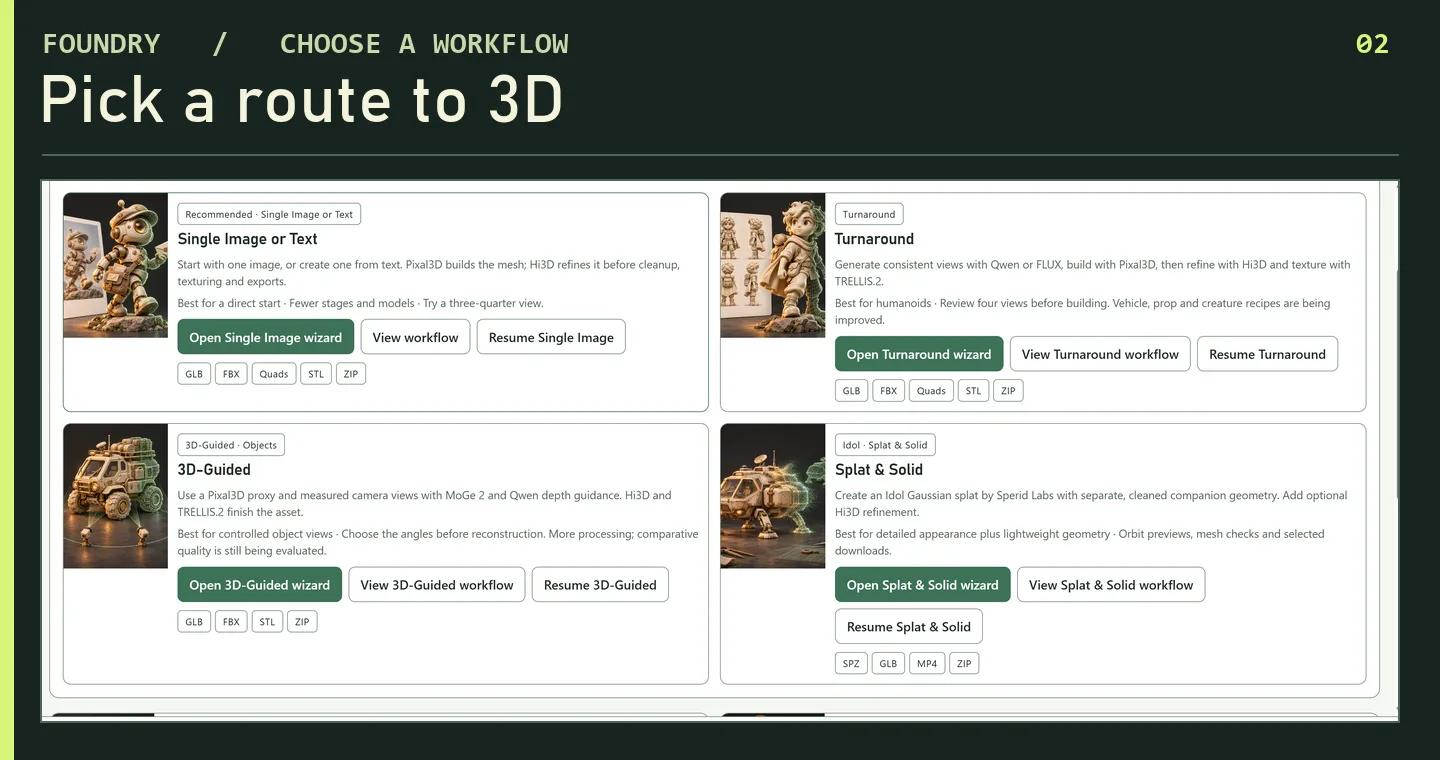
In Choose a Workflow, open the Single Image wizard. Drop in a picture, pick one from Gallery, take a webcam photo, or use Create Image to make a reference from text. A clear three-quarter view is a good start for an object like this lander because it shows more of its shape.
You’ll see other routes in the same picker. Turnaround generates four views for you to review and is a good place to start for humanoids. 3D-Guided gives you more control over the camera views used to build an object. Splat & Solid makes a Gaussian splat for visual detail and a separate companion mesh. For this walkthrough, one image is all we need.
2. Build and inspect the shape
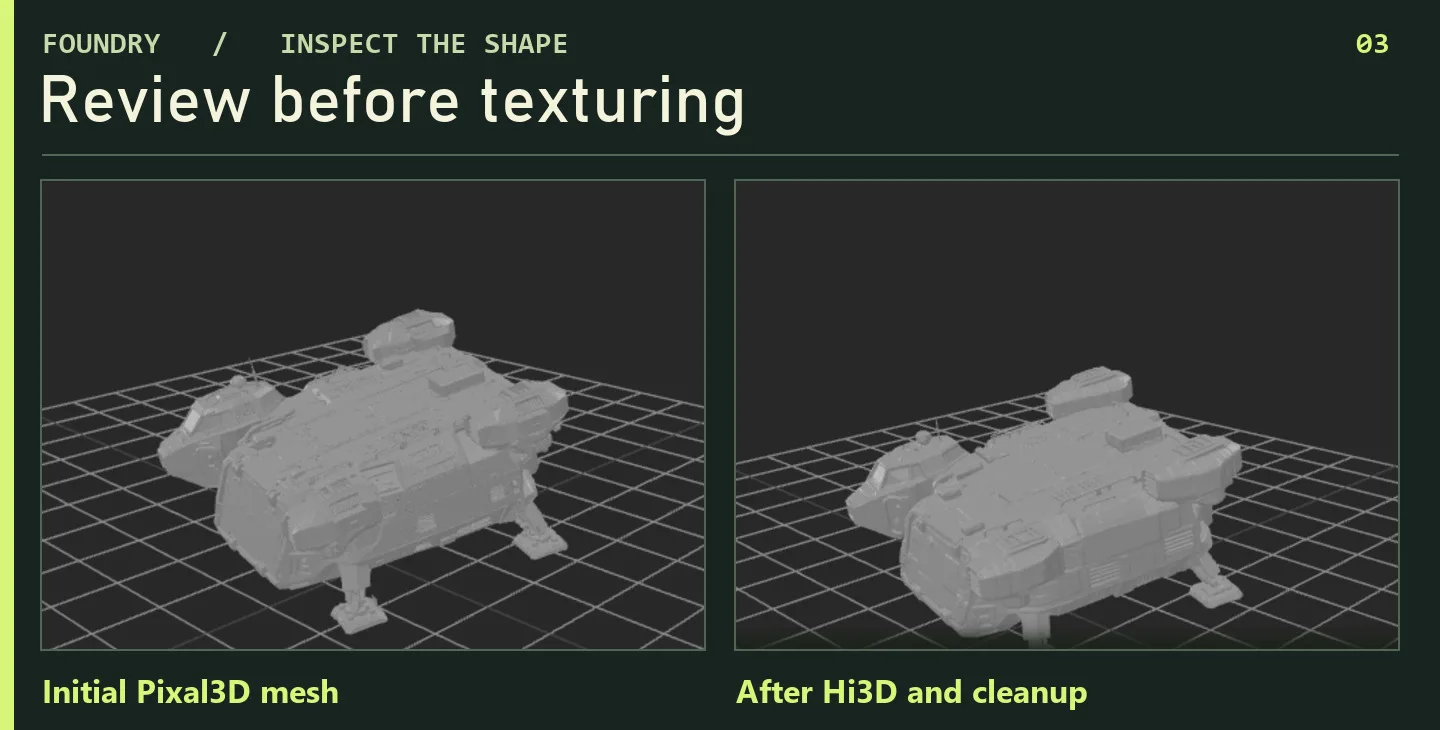
On Mesh and refinement, start with the recommended settings. Pixal3D builds the first mesh from the reference. Hi3D uses that same image to refine the geometry, and Foundry cleans the mesh before texturing. In Refined mesh and exports, orbit the model and look at the silhouette and details from a few angles.
3. Choose what to take with you
- Blender: Start with a detailed GLB to inspect the textured asset. If you want editable quad faces, select an optional quad output and save it as BLEND.
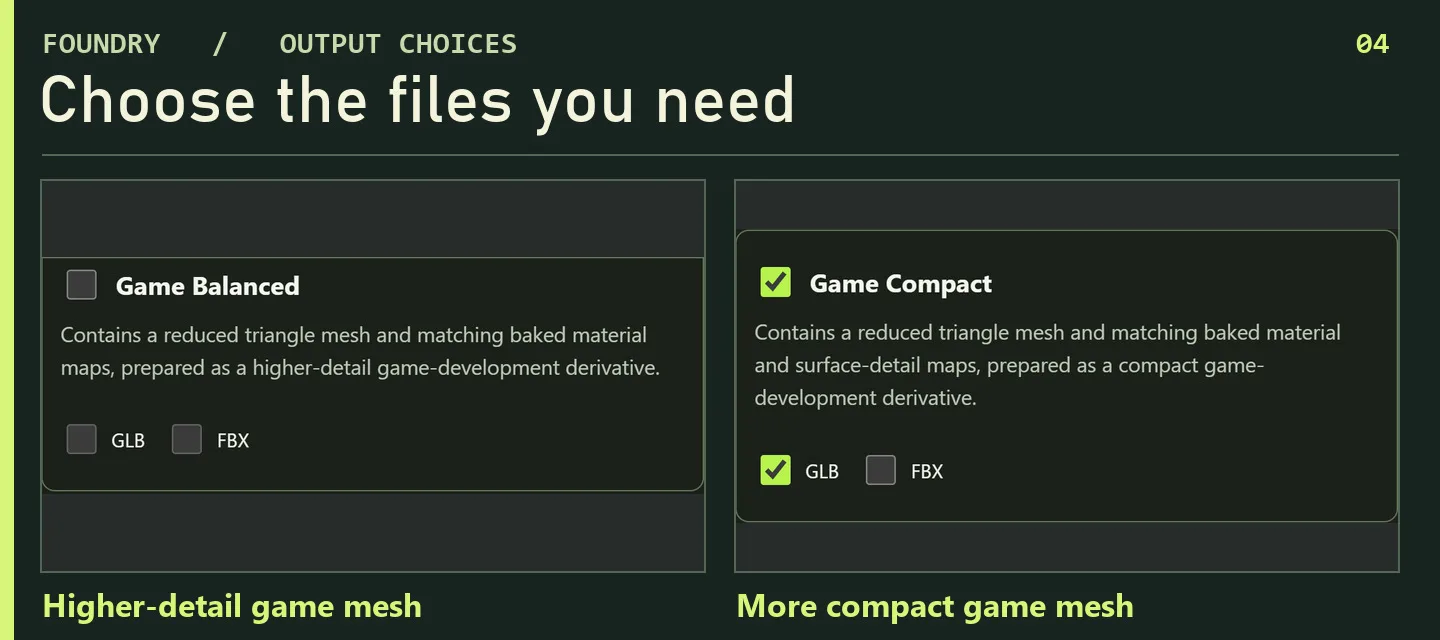
- Games: Choose Game Balanced or Game Compact for a reduced mesh with baked textures. Pick GLB or FBX based on your toolchain.
- 3D printing: Choose STL for geometry and check scale and printability in your slicer.
TRELLIS.2 adds texture, and Foundry bakes the maps for the selected mesh versions. Textured triangle outputs are available with quads off. Once the package is ready, you can orbit the finished asset, switch between the prepared mesh versions, and grab individual files or the ZIP. The lander shown here was saved with detailed and compact textured meshes and an editable quad version.
Also in Foundry
HairDeck turns a hairstyle reference into stylized 3D hair cards. Compare variations, adjust the fit and materials, and see how the hair moves in a head-turn preview. Export a static GLB or a rigged VRM with spring bones.
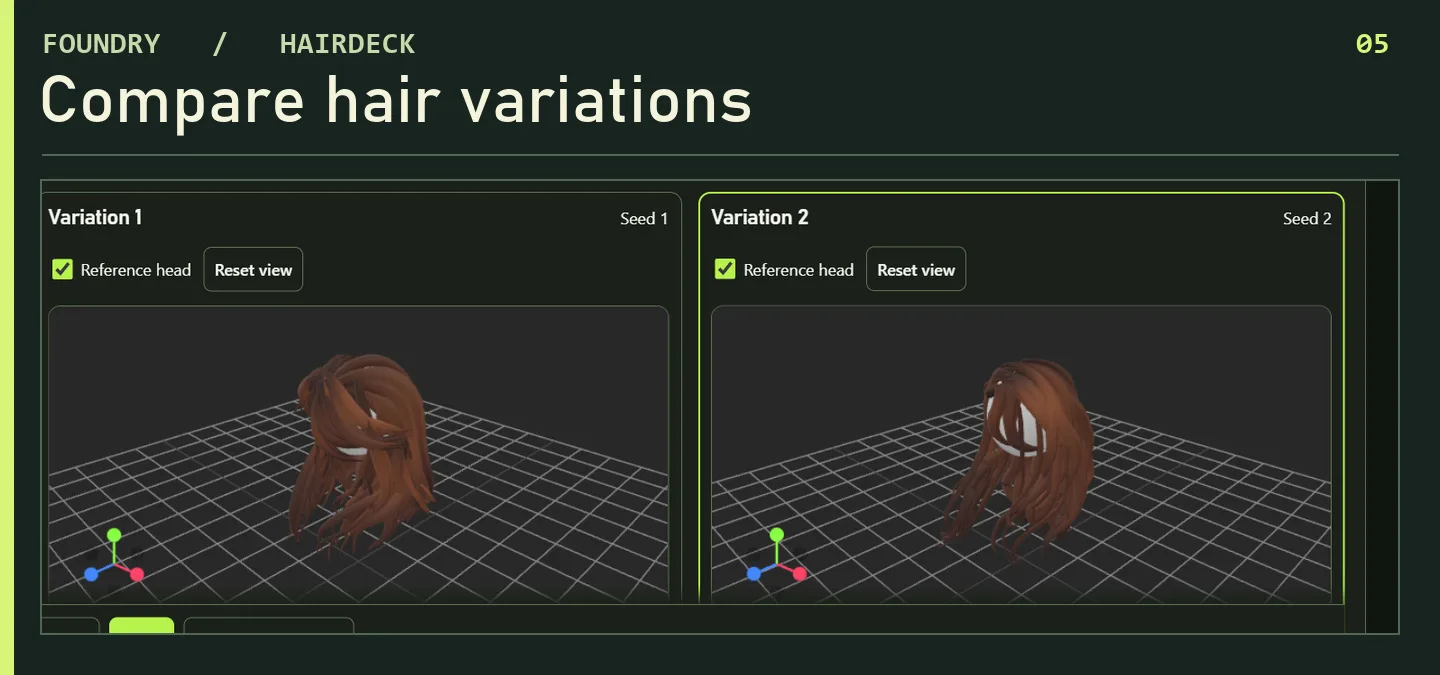
Here’s a short HairDeck motion preview from another hairstyle run.
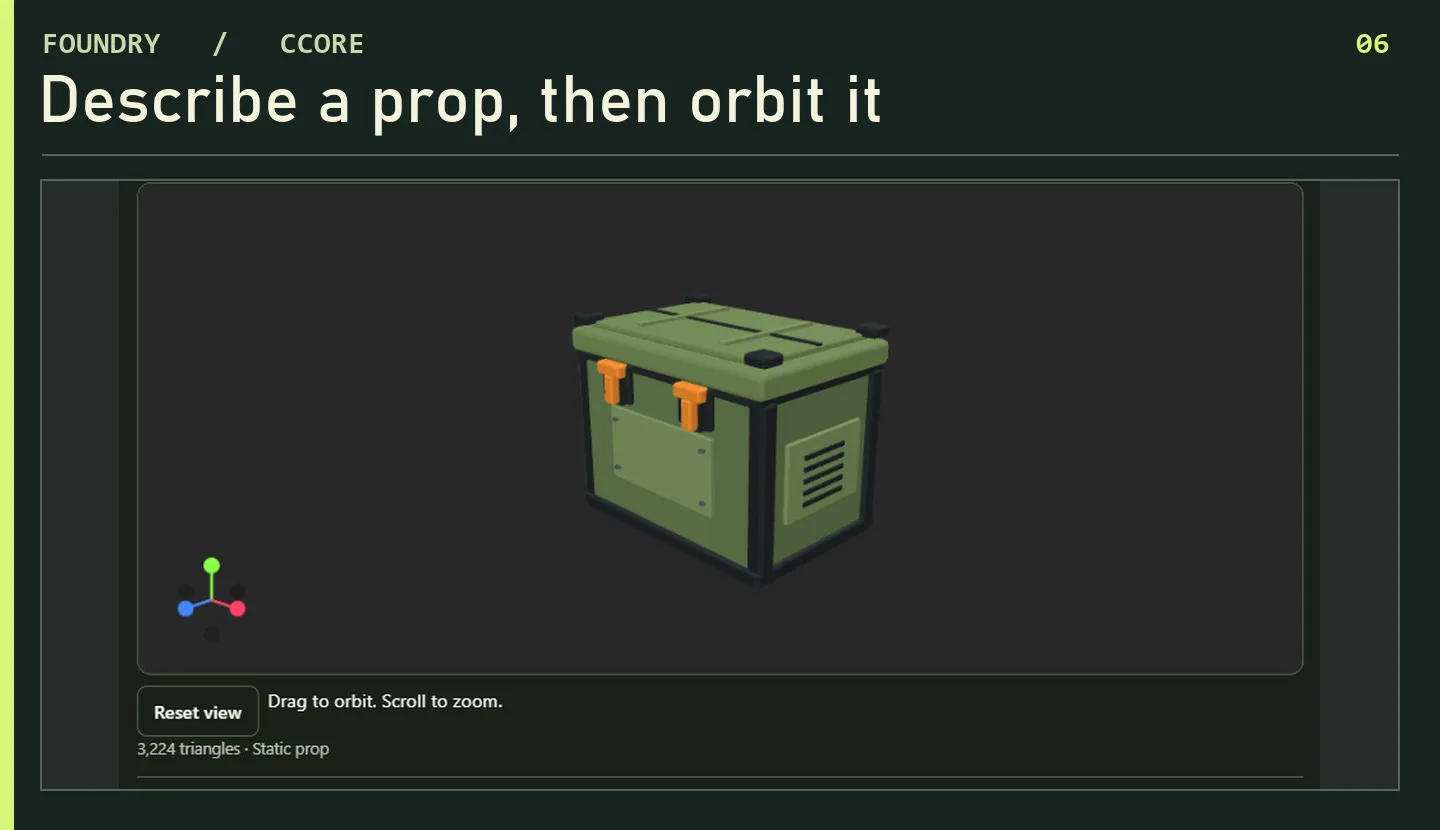
CCORE builds a stylized low-poly prop from a description. Start from one of 12 editable examples or write your own. You can optionally ask local Qwen to flesh out the brief before generating. Here’s a supply crate with olive panels and orange latches, ready to orbit and export as GLB.
For Claude and Codex: Foundry ships a local MCP that lets a connected agent submit supported jobs and come back for the results while your machine does the work. I’m working on a companion skill to help agents choose the right workflow and hand the asset off to Blender.
Thanks to @cocktailpeanut for suggesting a walkthrough, and to the researchers and community contributors whose models and tools make these workflows possible. If you want to try it, open the Foundry app card below. The current preview is for Windows with NVIDIA.



I wanted to show what it actually looks like to make something in Mumblebox 3D Asset Foundry. Here’s one cargo lander from start to finish, using a single reference image. Foundry runs locally, and Pinokio handles setup. You can follow the wizard without learning the ComfyUI node editor.
1. Pick a workflow and add an image
In Choose a Workflow, open the Single Image wizard. Drop in a picture, pick one from Gallery, take a webcam photo, or use Create Image to make a reference from text. A clear three-quarter view is a good start for an object like this lander because it shows more of its shape.
You’ll see other routes in the same picker. Turnaround generates four views for you to review and is a good place to start for humanoids. 3D-Guided gives you more control over the camera views used to build an object. Splat & Solid makes a Gaussian splat for visual detail and a separate companion mesh. For this walkthrough, one image is all we need.
2. Build and inspect the shape
On Mesh and refinement, start with the recommended settings. Pixal3D builds the first mesh from the reference. Hi3D uses that same image to refine the geometry, and Foundry cleans the mesh before texturing. In Refined mesh and exports, orbit the model and look at the silhouette and details from a few angles.
3. Choose what to take with you
TRELLIS.2 adds texture, and Foundry bakes the maps for the selected mesh versions. Textured triangle outputs are available with quads off. Once the package is ready, you can orbit the finished asset, switch between the prepared mesh versions, and grab individual files or the ZIP. The lander shown here was saved with detailed and compact textured meshes and an editable quad version.
Also in Foundry
HairDeck turns a hairstyle reference into stylized 3D hair cards. Compare variations, adjust the fit and materials, and see how the hair moves in a head-turn preview. Export a static GLB or a rigged VRM with spring bones.
Here’s a short HairDeck motion preview from another hairstyle run.
CCORE builds a stylized low-poly prop from a description. Start from one of 12 editable examples or write your own. You can optionally ask local Qwen to flesh out the brief before generating. Here’s a supply crate with olive panels and orange latches, ready to orbit and export as GLB.
For Claude and Codex: Foundry ships a local MCP that lets a connected agent submit supported jobs and come back for the results while your machine does the work. I’m working on a companion skill to help agents choose the right workflow and hand the asset off to Blender.
Thanks to @cocktailpeanut for suggesting a walkthrough, and to the researchers and community contributors whose models and tools make these workflows possible. If you want to try it, open the Foundry app card below. The current preview is for Windows with NVIDIA.